The other day I went out to the ebike shed to try to find something to ride. Much to my dismay, every single bike I owed was broken or out of commission. I had let my maintenance issues fall a little too far behind and there was literally 15 broken ebikes that I couldn’t use. I find it funny when people ask me ‘what ebike should I get’ as if one ebike is ever going to be enough if you actually thrash on it everyday on the trails. Two ebikes seems to be an absolute minimum and three seems to be a comfortable number where you will mostly always have something to ride. Its important to realize that most bicycles are designed with components that are designed for 350 Watts of power which is the amount of energy most people can generate with their tiny little chicken legs. When you start running 1000-2500 Watts of power through a bicycle drivetrain then components are guaranteed to break. This article describes a lot of the issues I’ve seen in the last 3 years and how to deal with them in a way that will keep you on the trails everyday instead of sitting on your ass waiting for parts to arrive.

Replace busted crap ass zippers on your triangle bag with strips of Velcro ONE tape. It works like a charm.
Do you really care about your Battery? You should.
The battery is one of the most critical pieces of your ebike and it also requires the most care to keep working properly. I’ve destroyed more than my fair share of battery packs and now I have some standard rules I use for battery care:
- I only charge the packs to 80% unless I know I’m going to need the extra range then I charge them to 90 or 100% right before I ride. Charging your packs to only 80% can double the life of your batteries.
- Every 5-6 months I charge every one of my packs to 100% so the pack will balance the cells properly.
- When I store the batteries I store them at room temp in a dry place at 50% charge (that is the batteries nominal voltage so for a 48v pack it would be around 48v, for a 52v pack it would be 52v, etc.) Instructions on how to safely drain down your packs are here.
- When charging anything lithium based I always charge them in my woodstove.
Most ebike battery pack failures are due to improper mounting. If you have a soft pack and it is touching the frame then it must be padded. I use cheap Thermarest pads which cost about $20 on ebay and seem to work surprisingly well (article on proper pack padding here). Make sure that you remove your bottle mounting bolts if you are putting a triangle pack in place or the bolts will quickly wear through the triangle pack and into the batteries. I have destroyed about 5 zippers on different triangle packs over the last 3 years and now I just use the 1″ Velcro One and sew strips on both sides of where the zipper used to be and use that to close the bag. Works like a charm. If you don’t have a sewing machine you should buy one, I find my $80 Brother sewing machine to be as useful as any soldering gun or meter.
Problems with Frame packs
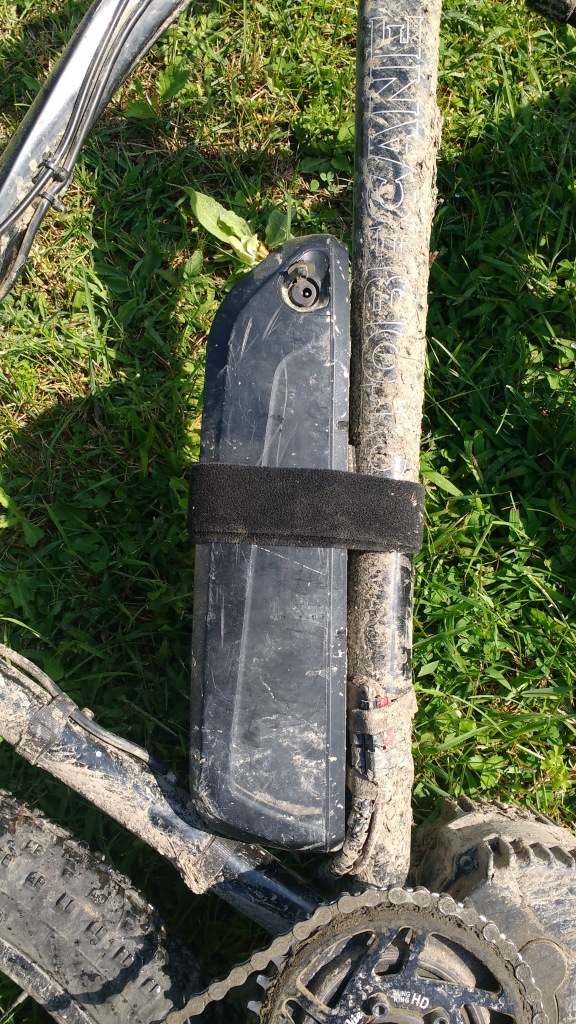
I love my 52v GA shark frame pack but I have had a lot of problems with it. When mounting it you must make sure that the water bottle bolts do not rise up above the level of the plastic. If you use the long metal ovoid washer on the shark pack then you will probably need to grind down the top of your water bottle bolt or it just won’t work well. When you try to mount the pack you will end up breaking the plastic tabs off that hold the pack in place. I’ve done this several times before I realized it was a problem. Also, it helps the frame packs if you take a strip of the 1″ Velcro ONE tape and wrap it all the way around the pack and the frame. This will keep it from wiggling when you hit bumps and dump your bike (because you know you will). When riding even on the road you MUST lock your battery to the frame. I’ve had packs fly off that are even locked down, if you don’t lock your pack it’s guaranteed that it will fall off.
The frame packs seem to work OK with only 3 of the tabs out of the 6 unbroken as long as some of them are on different sides. It’s pretty easy to swap the cases around and takes about 15 minutes to do so. Contact the company you bought the pack from and hopefully, they will accommodate your needs.
Forget about the Nuvinci N380 on anything over 750 Watts
Although I have written a host of articles on Nuvinci products, and the BBS02 powered N380 has been my favorite ebike for the last year and half I simply cannot recommend that people install a N380 (or anything other than a N171) on any ebike that puts out more than 750 watts peak. Although I babied my N380 and didn’t thrash on it too hard, it started leaking within a week of installing it and it continued to leak for 1.5 years until it finally failed. I tried to epoxy the seal that the fluid leaked out of but that crazy magic Nuvinci fluid seems to find its way through anything, even the epoxy. Since I am not ‘that guy’ I didn’t try to weasel a free N380 out of Nuvinci (those guys are way too cool to scam) although I have heard of people getting several N380’s out of their company by conveniently not mentioning that they were installed on high power ebikes.
It might seem unfair to not recommend the N380 after I was able to ride it for 1.5 years with a leaky hub but to still recommend the Nexus-3 even though both failures were catastrophic and kept me from riding. There is a method behind the madness, the fluid that leaks out of the N380 is pretty nasty and seems to get on everything and smells really bad. In my opinion, it’s better to have a catastrophic failure that is easily replaced than to drive your equipment into a long drawn out death.
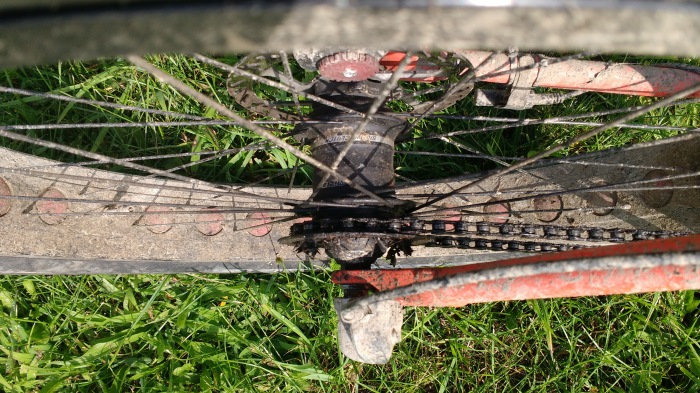
In both Nexus-3 failures I had, the unit separated between the hub and the cog. At <$80 for a new one it’s not worth my time to fix.
The Nexus 3 is not all that reliable either
I’m a big fan of the Nexus 3 IGH and have installed it on several ebikes with thousands of watts of power. In 2nd gear it locks the 4 pawls and seems to be able to take almost anything you can throw at it. Although it has limited ‘gear’ range it is pretty durable and incredibly cheap. I’ve had 2 of them fail in the last 3 years, both had the same problem where they split apart by about 5 mm and everything stopped working. I don’t have the time or energy to take them apart to figure out why they failed but instead just build up a new wheelset with a new Nexus 3. One of my discoveries with the Nexus 3 is a cog with a plastic shield that keeps the chain from falling off when installing on a fat-tired bike. This seems to work surprisingly well and is easily found if you do a search for CS-S500 and it comes in 2 different sizes. Even with 2 failures I still recommend the Nexus-3 and Sturmey Archer and other 3-speed IGHs for mid-drive ebike builds.
Overinflating fat bike tires *BOOM*
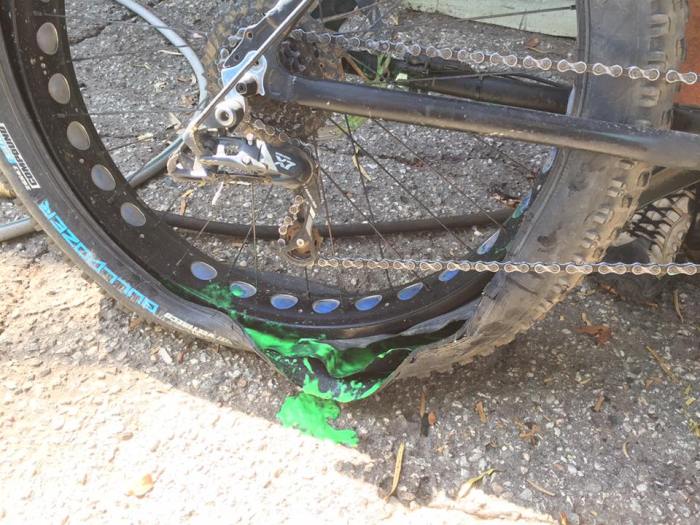
Fat bike tires are not designed to ever be inflated beyond about 20 psi. If you overinflate them then one of two things happen, they explode, or they can get dramatically out of whack. I had one tire that I inflated to about 30 psi to try to seat the bead properly and it got insanely wonky with the tire bulging out of the sidewalls at several different points on the tire. I still ride the bike that way for over a year, but it wobbled pretty bad at high speeds and it looks really strange to ride it, almost like some kind of cartoon where the wheel is busted and wobbling all over the place.
Curt Fisher, the poster child Grandpa that will shred till he’s dead, tried to over inflate a Bulldozer 4.7 to get it to seat properly on the rim on a tubeless setup and ended up blowing up a perfectly good tire. Seems like a waste of a perfectly good tire just to get a few likes on Facebook. I’ve had tires blow up in my face before and it’s actually really scary too. Scary like that creepy fun house your neighbors used to set up every Halloween.
Take good care of your motor
There are a lot of ways properly care for and feed your motors, but the main ones are
- Don’t get it super wet, like submerging it entirely in water on a creek crossing
- Don’t get on the throttle and peg the throttle as hard as you can for as long as you can
- Motors like to spin fast, when it’s struggling on a steep hill try to downshift and apply less power, don’t peg the throttle
- Get the right size Chainring for your application, if your front chainring on a mid drive is too big then you’re taxing the motor too hard
- Keep that secondary reduction greased up
When I get a new BBS02/BBSHD I usually take it apart and apply Mobilgrease 28 to the secondary reduction gear. By packing grease around the large cog I have yet to burn out a pinion gear on any of my 12 drive units even with hundreds of miles of hard riding. Greasing the secondary reduction is a 5-minute job, I don’t usually grease the Nylon gear unless it fails and I have to replace it. Replacing the Nylon gear is closer to an hour and it’s important that you never grease the nylon gear with any black (non-lithium based) grease. The Mobilgrease 28 is specifically designed for plastic parts, but most axle greases will break down plastics very quickly.

I destroyed a lot of bike seats (over 30) with my fat ass before I discovered the Giant Connect seats. I buy them 5 at a time as pull-offs from new Giant bikes for $15 each. The metal rails just don’t seem to bend on these seats.
Problems with 100mm BBS02 conversions
I have a total of 5 BBS02 100mm conversions, two of which have failed over the years. Both failed when the steel threaded extension ripped out the aluminum threads that had been tapped into the main BBS02 body. This is probably because the aluminum on the BBS02 case is pretty low quality cast aluminum and there is little that you can do to work around the problem. The first failure I just took the drive unit extension apart, slathered it with JB Weld and then put it back together which seemed to work surprisingly well. If you do it this way make sure none of the JB Weld gets inside the drive unit or you’ll have a lot of problems. The second drive unit that failed I just took it apart and put the old 68mm axle back in it and threw the 100mm extension and axle into my spare parts bin. That works too. If you have a 100mm bike to convert you are much better off just getting a 100mm BBSHD kit than trying to use a BBS02 conversion.
Cheaper bike components are often times more durable than the expensive stuff
I burned out 2 freehubs on my Phat Phuk build before I switched over to the DT Swiss 350 Big Fat Ride hub. The DT Swiss hub is very expensive but has a steel ratcheting mechanism instead of the aluminum freehub body with pawls that the Bikes Direct FB5 2.0 shipped with. This is a rare example of the more expensive bike part being much more durable than the cheap bike part. Aluminum chainrings, cogs and freehubs simply cannot survive the abuse of several thousand watts of electric power. Electric motors produce dramatic amounts of torque at very low RPM ranges which will easily taco aluminum cassettes or chainrings. The only exception to this rule that I’ve found is chainrings like the Lekkie and Luna chainrings that are specifically designed for ebikes and the Race Face narrow\wide chainrings which are also incredibly durable.
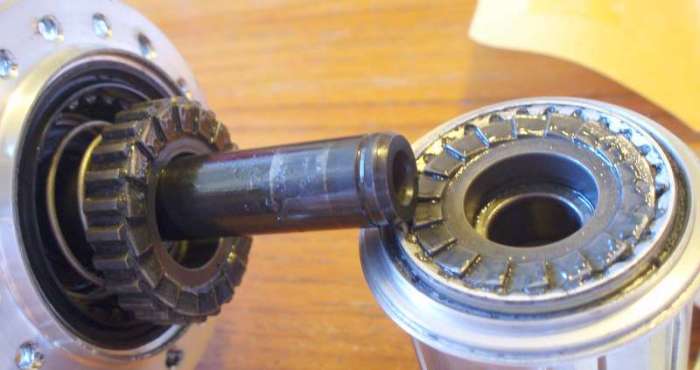
The DT Swiss hubs have a ratcheting engagement system that has many contact points and is made of steel
With derailleurs and shifters, I tend to settle on X7 or X9 level stuff because they are the most durable level that doesn’t seem insanely expensive. In the bike world, they say there are three main criteria:
- Price
- Weight
- Durability
For any bike component, you can pick two. For ebikes most of the time you want the cheap durable parts and to hell with the weight since you have the motor to help you push all that extra weight around. I’ve had more success with the durability of $300 bikes than I have with converting bikes that cost 4-5 times as much. The root of the problem all goes back to the overuse of lightweight aluminum parts on high-end bikes, where the cheap ones almost always have a steel drivetrain. The thickness of the chain is directly related to it’s reliability with 11 speed chains being the most unreliable and single speed chains being the most reliable. I’ve had very good luck with very inexpensive KMC single speed chains for my most powerful bikes and $25-30 SRAM chains on everything 9 speeds and higher.

JB Weld is an awesome way to repair aluminum frames, this frame broke just above the junction so I just JB welded the seatpost in
Fixing busted bike frames
If you’re thrashing on ebikes the way I do then you’re going to break frames. Welding aluminum is nearly impossible to do correctly. You are much better off getting a piece of metal tubing that is slightly bigger than the break, sliding it on the frame past the break, sanding and covering the break on BOTH sides with a powerful 2 part epoxy like JB Weld (buy it in the big tubes). Just don’t accidentally brush your teeth with that stuff because it will really suck. The most important thing to remember is not to get attached to anything. Your job is to destroy everything you touch, so just do it.
Gear Equilibrium
In whitewater kayaking, kiting, hydrofoiling, downhill skiing and electric biking I’ve noticed a phenomenon I will call ‘Gear Equilibrium’. As you ride the weakest parts of kayak, kite, kiteboard, hydrofoil, skis or bike will always break depending on the level at which you are practicing the sport. At some point, the break downs level off and you are left with far fewer repairs than the first several years of your involvement in that sport. This leveling off of breakdowns is what you are aiming for. You’ll know when you get there because you won’t be fixing your bike every other ride.

As stuff breaks make a list of what you have to repair so whenever you have free time you can chip away at it
When I’m out riding I just listen to the Ladyton song ‘Destroy Everything You Touch‘ and I celebrate the destruction of all things ebike. Attachment truly is the root of all suffering and the more you get attached to having a functional ebike, the more you will ride at below your ability level or suffer from undue trauma & stress every time something breaks.
A lot of guys are like ‘Why should I get into ebikes when I can buy a cheap gas dirtbike for a fraction of the cost?’ That is a question that there really is no good answer for. I enjoy getting up at 7 AM every morning and riding on the local trails without the noise or smell of gas. When I return back home to my wife waking up I feel energized and refreshed and when I’m on the trails I can exercise as much as I chose to. Riding gas-powered dirt bikes is an entirely different experience which is fine for a lot of people, but not for me. It is a pain having to constantly fix all these bikes, but for me, the trade-off is worth it. If someone wanted to get into this sport and only buy one ebike then I would tell them that they better stay on top of their bike maintenance or they are going to spend a lot of time not riding. Two ebikes is better than one, three is better than two, fifteen is better than three. Buy what you can afford to and be prepared to shed blood sweat and tears to keep them running.
It’s worth every second of my precious life that I waste on it.
“All we have to decide is what to do with the time that is given us.” – Gandolf
I’m off to Black Rock City (highest bicycle per capita city in the entire world) to dance my heart out for a week straight and to watch the Eclipse in the middle of the Oregon desert. That is how I chose to spend the time given to me.
Ride On.





No comments:
Post a Comment