I’ve done three conversions with Doug’s 100mm axle conversions for the BBS02. While the conversion kits he sells are great, they require more attention while installing that what I provided initially. Hopefully you can learn something from my stupid mistakes. For my initial review of the axle installation process check out this post. I recommend the kits for anyone who wants to convert an existing BBS02 to the 100mm axle kit and as is much cheaper to do so than to buy a new 100mm converted BBS02.
Spray paint the axle extension
I’m not sure why I didn’t think of this, it came as bare steel and then rusted pretty good in the one season I used it. Although you work hard to keep salt and water out of the BB area, it will seep in and your BBS02 Extension will rust over time unless you paint it.
When tapping the BBS02 don’t let the threads clog
The first axle I installed the tap quickly got very difficult to turn. I didn’t know what I was doing so I went ahead and tapped almost the whole depth with the threads clogged. When I removed the tap I saw the errors of my ways. The clogged threads had removed much more material from the inside of the BBS02 than I wanted it to. I cleaned the threads and tapped it again a bit deeper. When I mounted the axle extension it was pretty loose until the last couple of turns. Although I lock-tited it in place it still came loose over time. If this happens to you, all is not lost. You can use a little DP420 Epoxy on the threads to mount the axle extension. Just be aware that when you do this it will never come off again no matter what you do.
Use a lot of good quality tapping oil like Tap Magic and if the resistance increases when tapping, back off, remover the tap and clean the threads and start it over again.

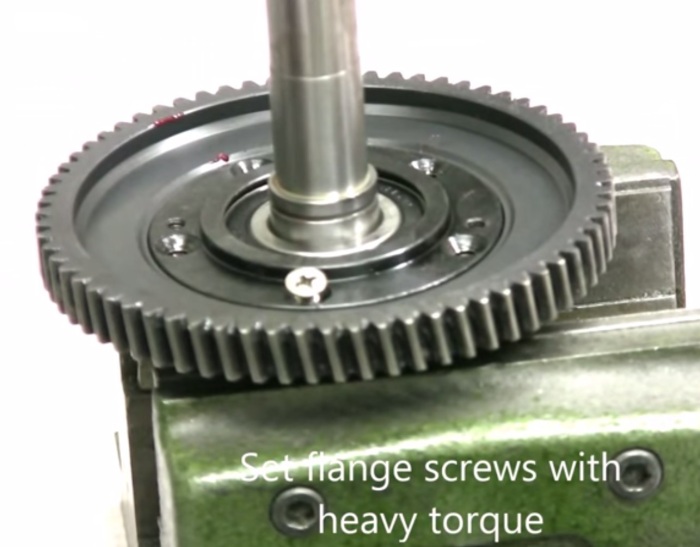
These screws must be locktited and torqued down as hard as you can. Image captured from the installation video
Use Locktite and tighten the hell out of the 5 large Phillips screws on the flange
My first conversion I did not tighten down the Phillips screws on the flange tight enough or use locktite on them. After several hundred hours of use they loosened up on me and I started getting a lot of thrown chains as the crank-wheel would move back and forth about 5mm. I would recommend when re-installing these phillips screws that you put the axle in a vise and get the biggest screwdriver you can. Put locktite on the screws and put all your weight on the screwdriver and turn it with a pair of vise-grips attached to the handle. Try not to strip out the screws. It is a terribly design (bad Bafang) and these screws should be Torx not Phillips head as it is nearly impossible to get the proper torque on these screws without the screwdriver head popping out.
Save the old Axle
I’ve already bent a stock BBS02 axle on another unit so having the extra axles around is a good way to swap out bent axles. I have yet to bend a 100mm axle from California Ebike, they seem to be top quality.
Doug’s 100mm axle kit is the only kit you can buy to convert your own BBS02 to 100mm to fit most fatbike’s bottom bracket. Although this is a top quality kit with an excellent installation video, you will still need to follow the above steps to make sure you don’t have issues with your kits in the future. I have hundreds of hours of riding on these kits and I can say with some certainty that if installed properly you will can get years of use out of them.
Ride On.
Click Here To Read More Article About Electric Bike Conversion Kit

No comments:
Post a Comment